Tutorial: How to Run Our First ZIO Project With VSCode?
ZIO is a type-safe library for building asynchronous and concurrent applications. The Scala compiler can catch a lot of errors at compile time since it is type-safe. This ensures that our code is mostly correct, and it prevents lots of bugs from creeping into the runtime. So having a type-safe editor that highlights errors will improve our development experience. VSCode with the power of the Metals extension provides us with a type-safe editor for writing Scala programs.
In this tutorial, we will walk through how to run our first ZIO project with VSCode. We will start by creating a new project and then importing that into the VSCode workspace.
Requirements
In this article, we assume that we have already downloaded and installed the following tools:
Creating a new ZIO project
- First, we need to create a new directory where we should put our project files:
mkdir my-zio-project
cd my-zio-project
- Next, we need to create a new
build.sbtfile:
touch build.sbt
Inside this file, let's add the following lines which include the version of Scala language, the name of our project, and the dependencies we want to use:
scalaVersion := "2.13.10"
name := "my-zio-project"
version := "0.0.1"

libraryDependencies ++= Seq(
  "zio" %% "zio" % "2.0.5"
)
- Also, we need to specify the SBT version we want to use in the
project/build.propertiesfile:
mkdir project
touch project/build.properties
Now, let's add the following lines to the project/build.properties file:
sbt.version = 1.8.0
-
We are ready to open our project in VsCode. We can do this by opening the
my-zio-projectdirectory from theFile > Open Foldermenu. -
When we open a project that has a
build.sbtfile, the Metals extension will automatically detect the project and prompt us with the following message:
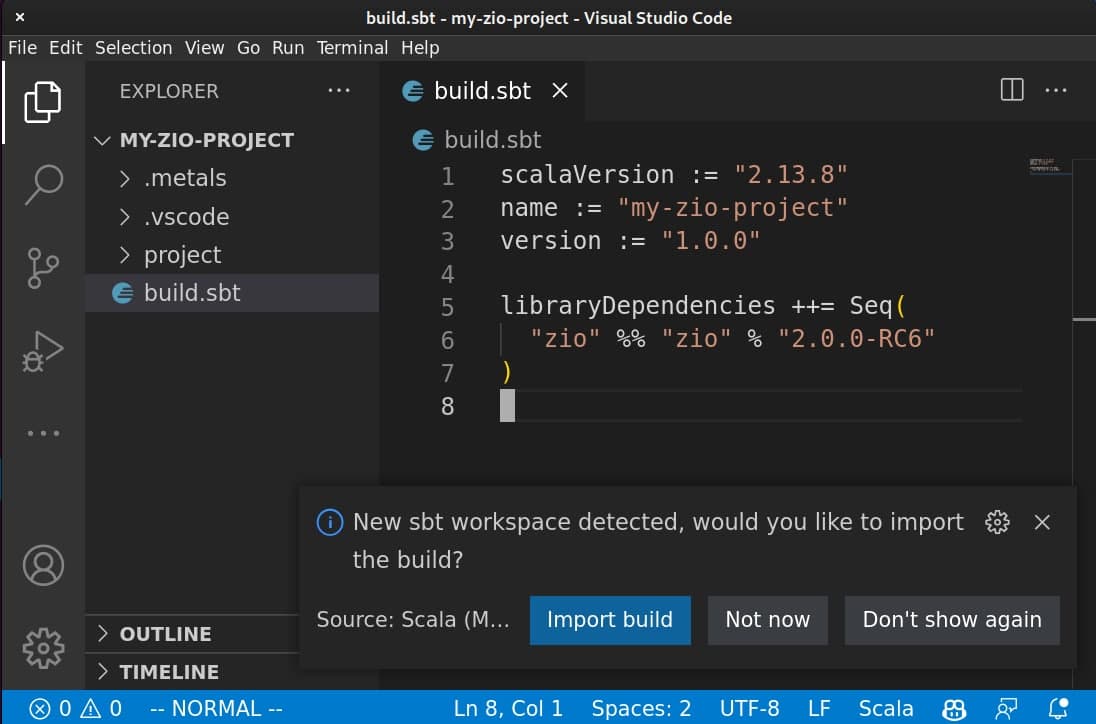
-
By clicking on the
Import Buildbutton, the Metals will try to download the dependencies from thebuild.sbtfile and then import the whole project into the workspace. -
After that, we are ready to write our first ZIO program by creating a new file called
MainApp.scalainside thesrc/main/scaladirectory:
$ mkdir src/main/scala
$ touch src/main/scala/MainApp.scala
Let's add the following lines to our MainApp.scala file:
import zio._

object MainApp extends ZIOAppDefault {
  def run =
    for {
      name <- Console.readLine("What is your name? ")
      _    <- Console.printLine(s"Hello, $name!")
    } yield ()
}
Now, we can run our program by clicking on the run button above the MainApp object.
After we have imported our project using Metals, the editor can highlight syntax errors, type-check our code, and run the program. Additionally, it provides code completion that helps us choose the right method. Another handy feature is the ability to jump to the definition of methods and classes just by _Ctrl + Click_ing on them.
Diagnosing the Build
Sometime, the build may fail. To diagnose the build, the first place to look is the Metals output, which can be found in the Output Window in the VSCode. The output window can be opened by typing Toggle Output in the command palette (Ctrl + Shift + P).
The Metals also provide a build diagnostics panel called Metals Doctor which can be opened by typing Metals: Run doctor in the command palette. This command will show us the status of the build and if there are any errors, it will guide us on how to fix them.
Conclusion
In this tutorial, we have learned how to run a ZIO project with VSCode using the Metals extension. VSCode along with the Metals extension provide lots of handy features that improve the productivity of developers. To learn more about this, we recommend reading the Metals documentation for VSCode editor.